Craft Corner: How to make a Thank You card for Teachers
There are less than four weeks to go until its officially the Summer holidays and that means parents need to be organised with sorting out thank you cards and gifts for teachers. Our classes tend to club together to put money towards vouchers. I don’t think you can ever go wrong with that, after all, there are only so many chocolates and wine they can go through right? I do like to have the boys help make a Thank You card if I can as it shows just how much we appreciate the work they do.
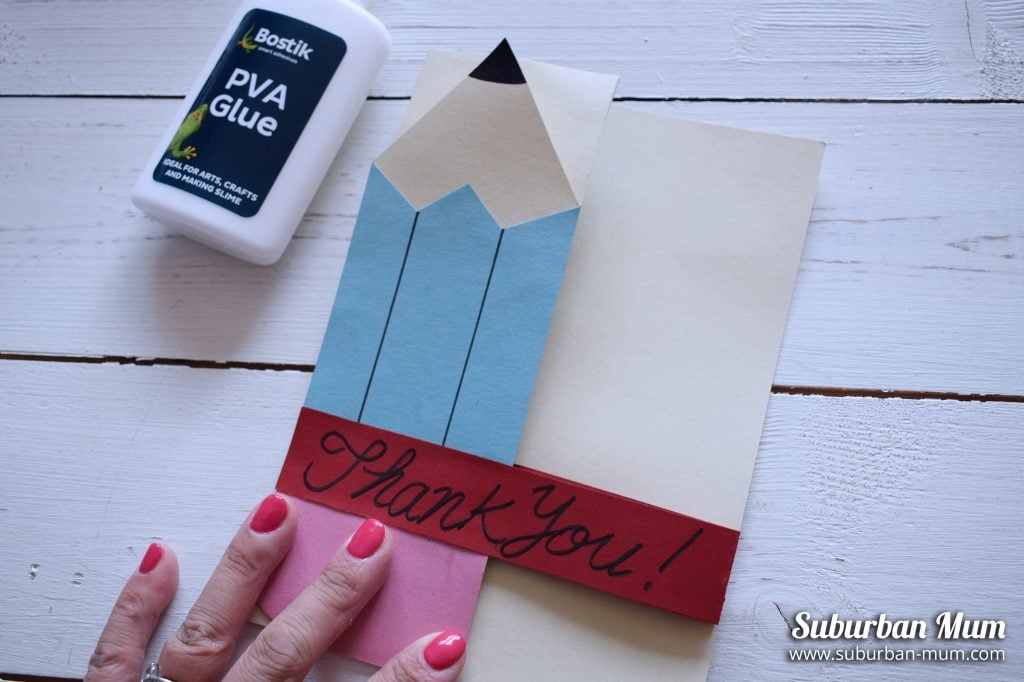
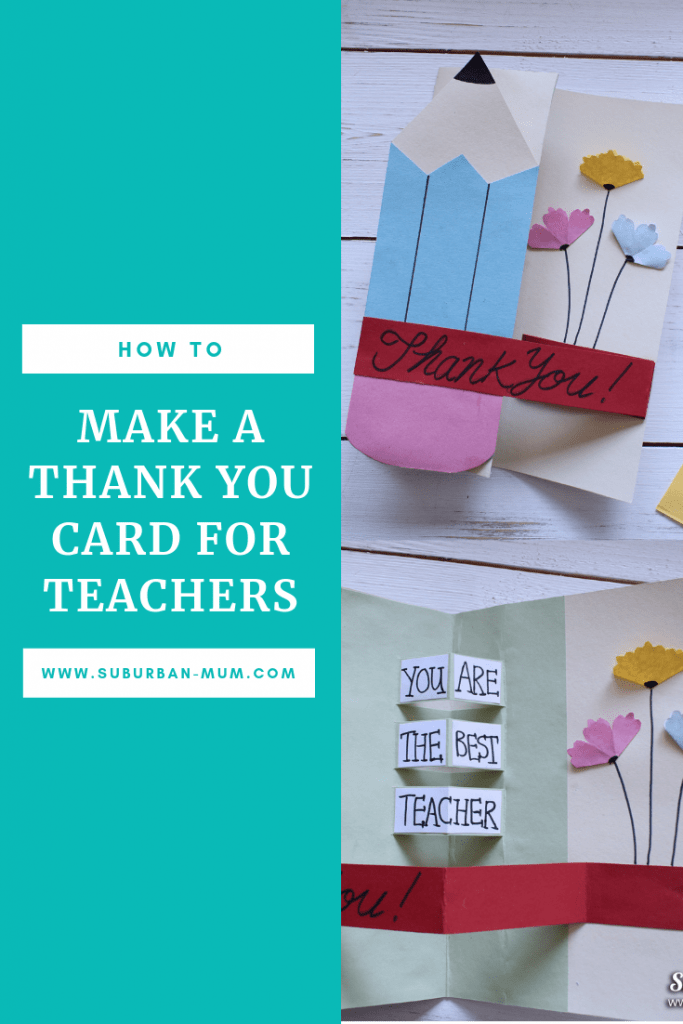
If you are looking to inspiration why not try the Thank You card below?
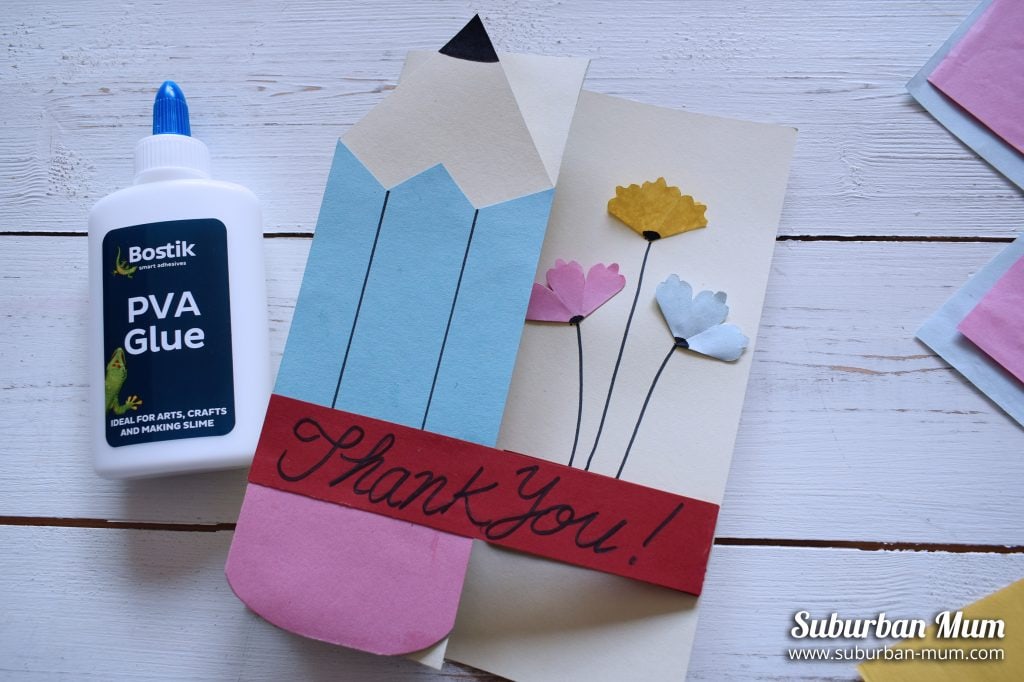
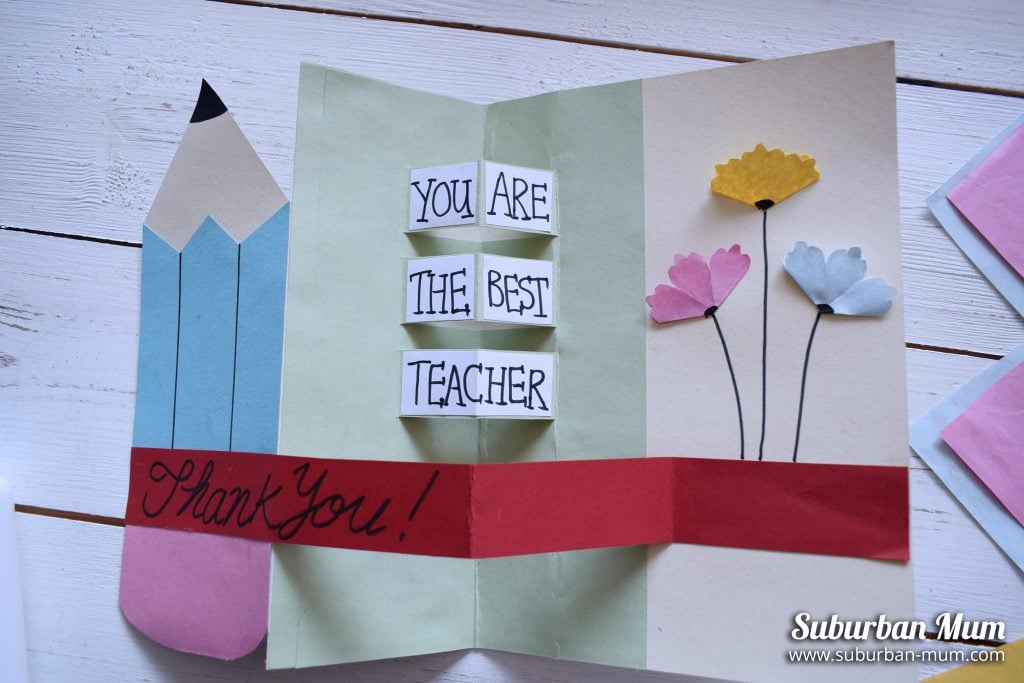
How to make a Thank You card for Teachers
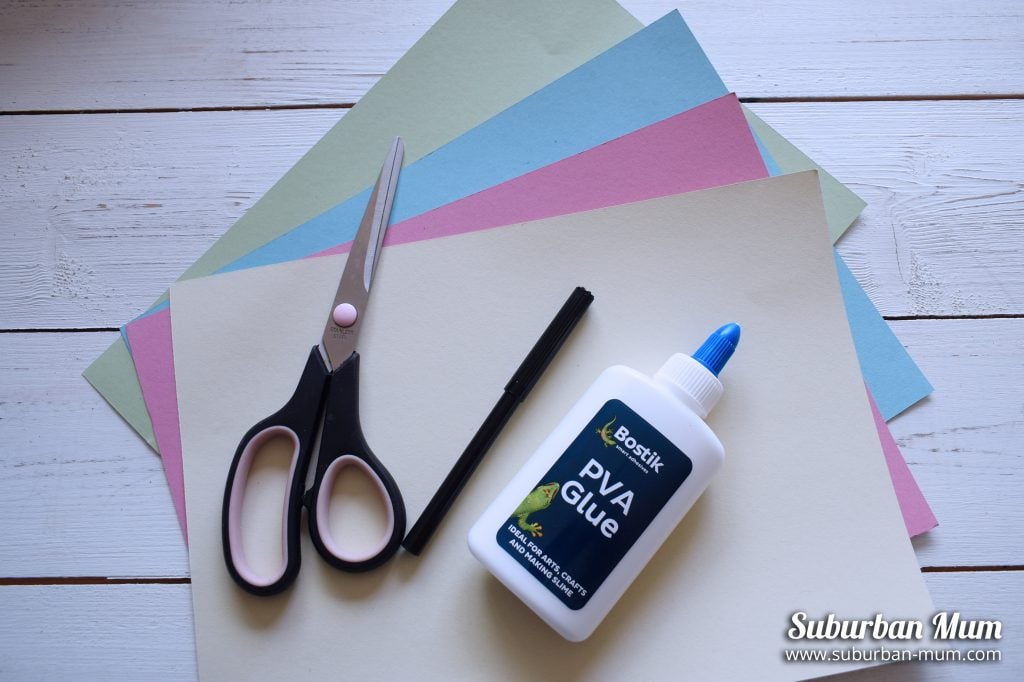
To create the Thank You card you will need the following:
- Bostik PVA Glue
- Pen/Pencil
- Various sheets of coloured paper and card
- Scissors
- Ruler
1. Fold a piece of A4 card in half and then fold the card back like the photo shown below.
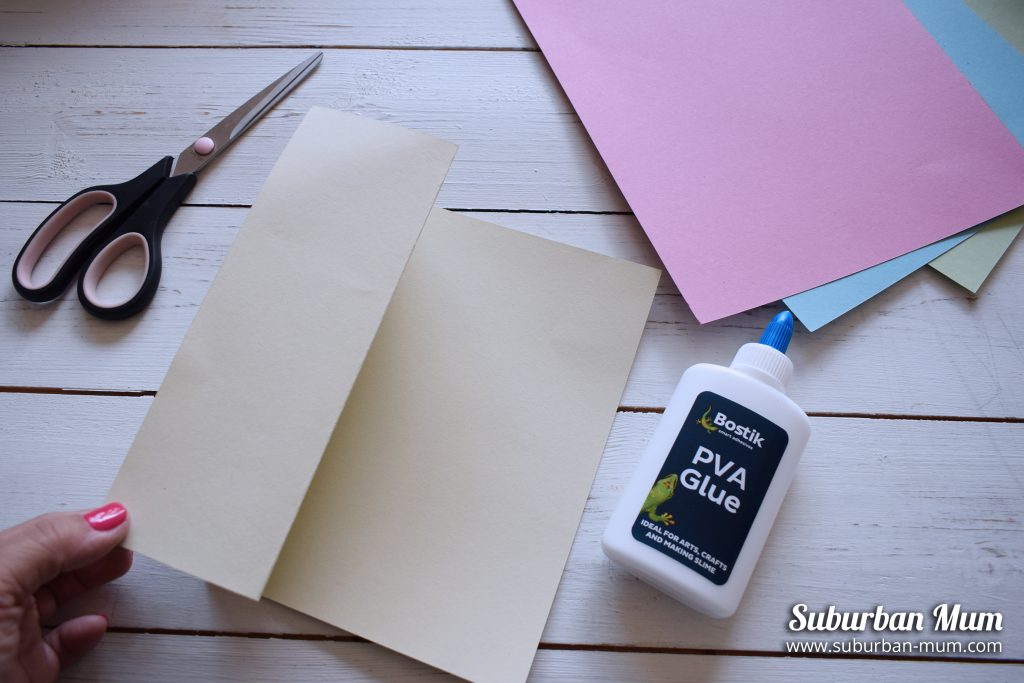
2. Next, cut a piece of coloured card the same width as the folded flap. This piece will be the pencil so you also need to cut triangles into the piece and glue down using the PVA glue (see below)
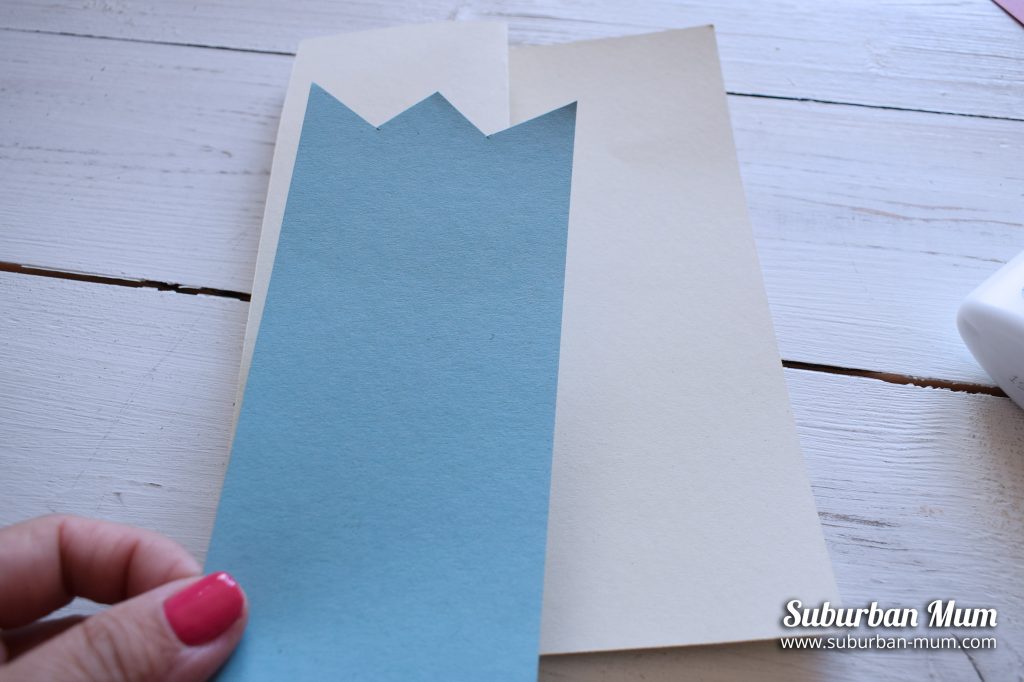
3. Draw the triangle for the pencil tip onto the white piece of card, cut out and then using a black marker pencil in the nib and draw in the lines for the pencil.
4. Take some pink card and draw out the shape for the eraser part of the pencil, glue on top of the pencil and then cut out the excess. (see below)
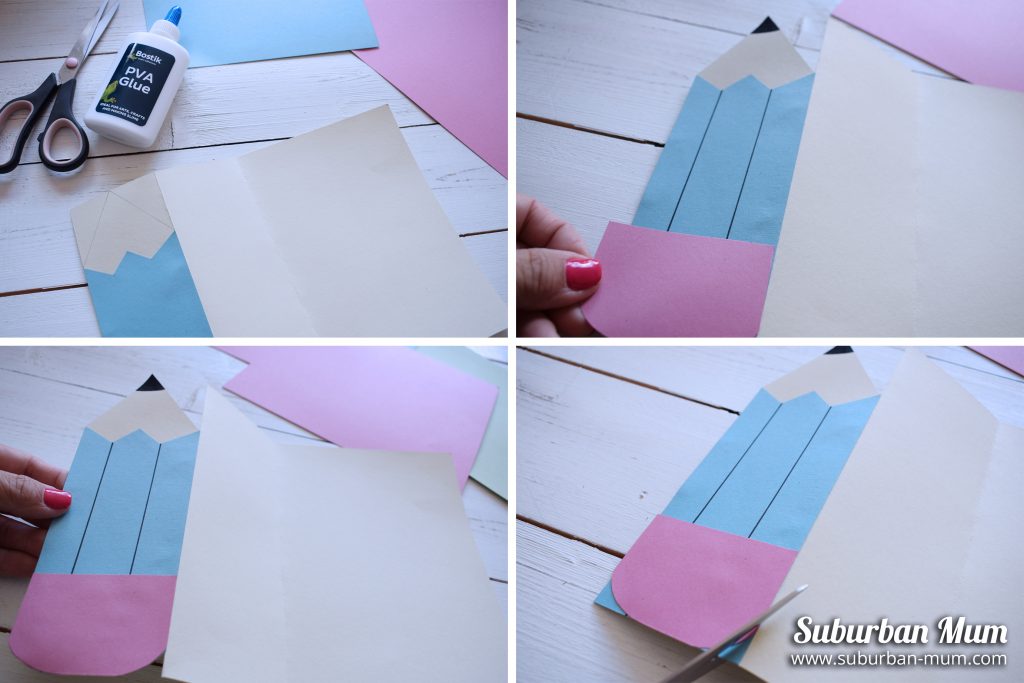
5. Cut out another piece of coloured card that is half the size of A4. This piece will be used for the pop-out message inside the card. Fold in half and crease slightly in half again.
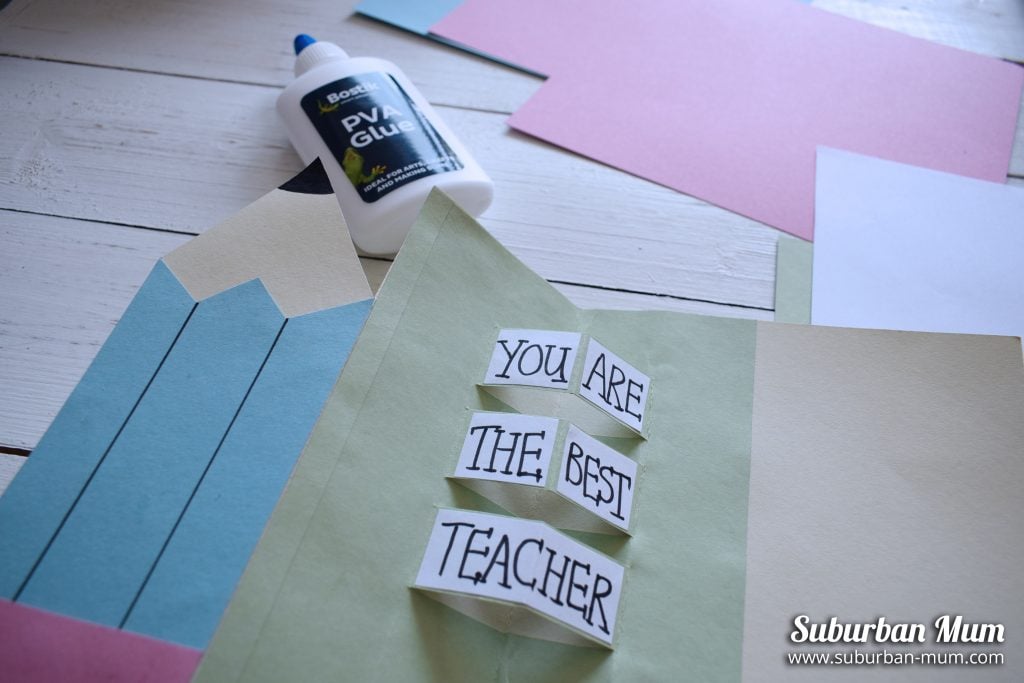
6. Using a pencil, draw out three equal blocks, allowing for space in between. Cut into the lines with scissors and fold over the blocks (see photo below)
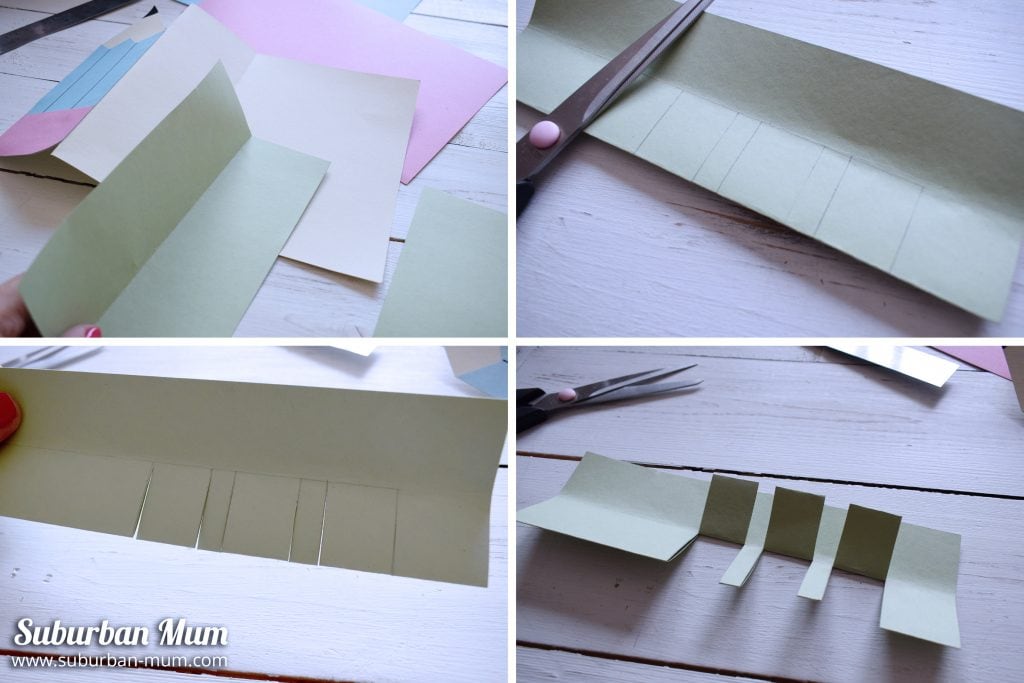
7. Turn over and pop on some PVA glue, line up with the inside crease of the card and stick down. Repeat on the other side. You should now have a card that has three blocks that pop out when you open the card.
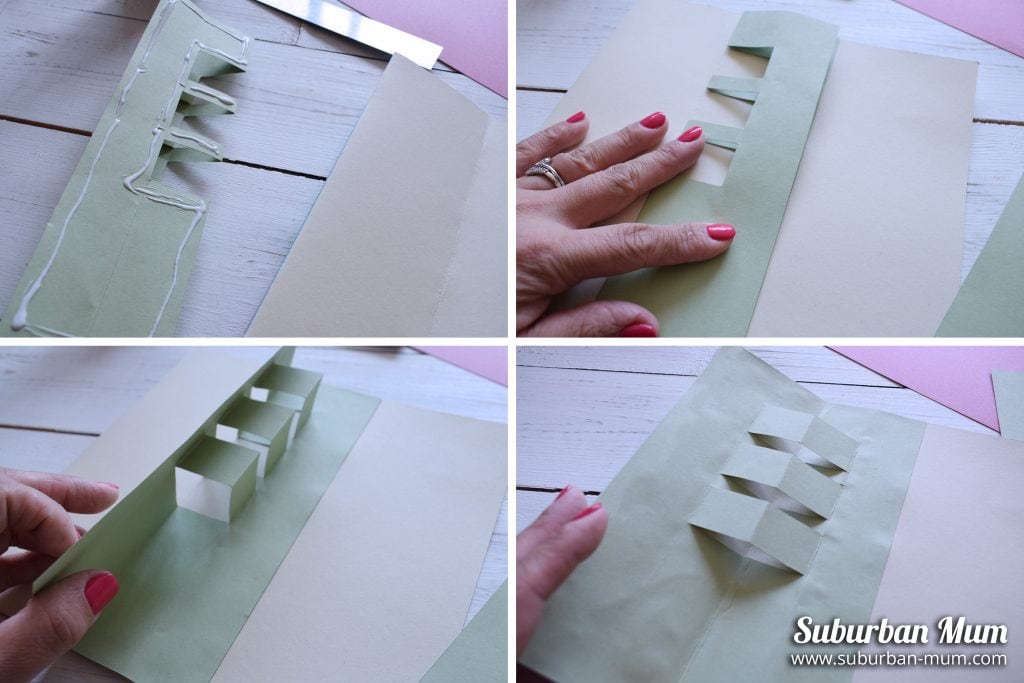
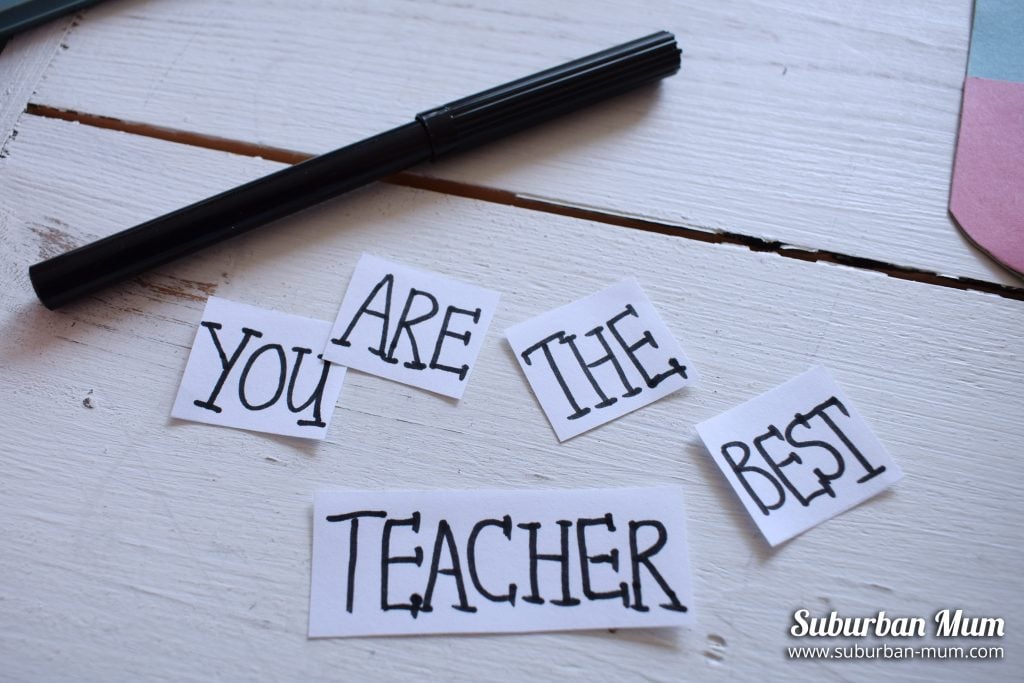
8. Cut out your message to stick onto the blocks. We went with “You are the Best Teacher”
9. Now we will make the title for the front of the card. Take a strip of coloured card that fits the width of the whole card when opened out, fold it in half, then fold the strip back.
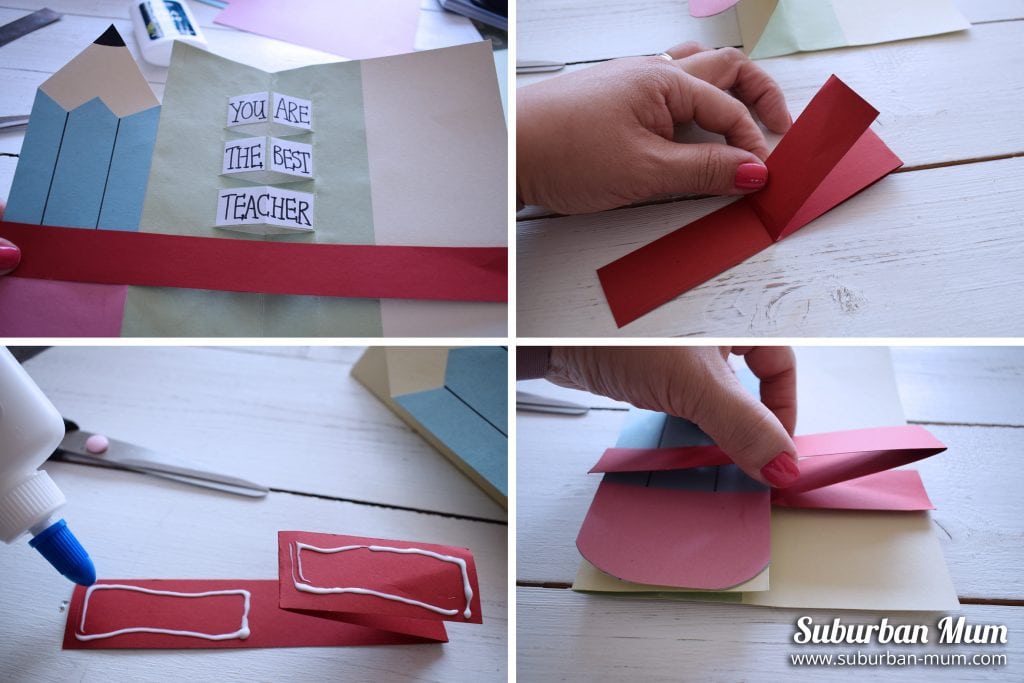
10. Turn over and apply PVA glue onto the back then position into place so that the longest part goes across the front of the card (across the pencil) and the smallest strip is positioned on the back of the card (see photo above)
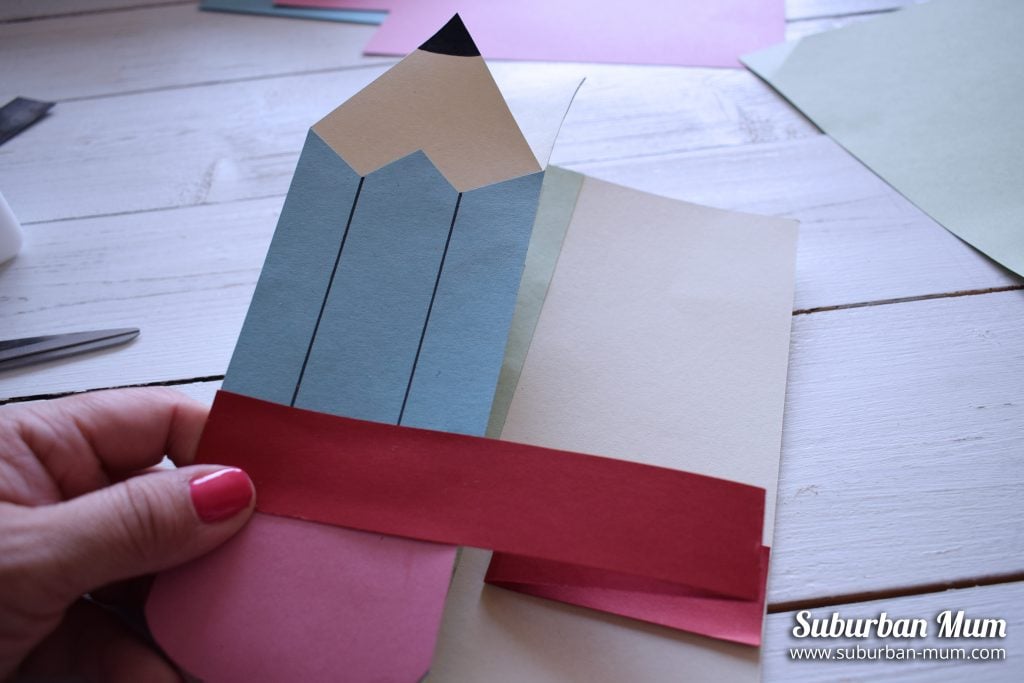
11. Using a pen, write your message.
12. Now we will make the flowers. Fold some small square pieces of paper into 4 and draw in the shape below. Cut and open out and you will have a flower pattern.
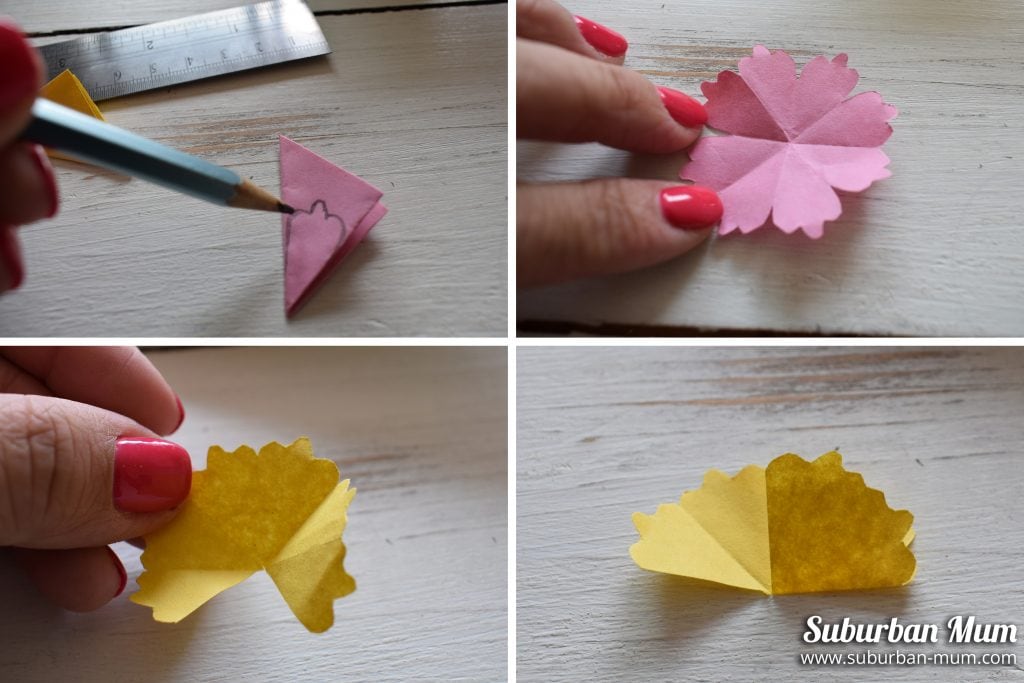
13. Cut one-quarter of the flower away and then fold in. Turn over and then position onto the card and glue. (see below)
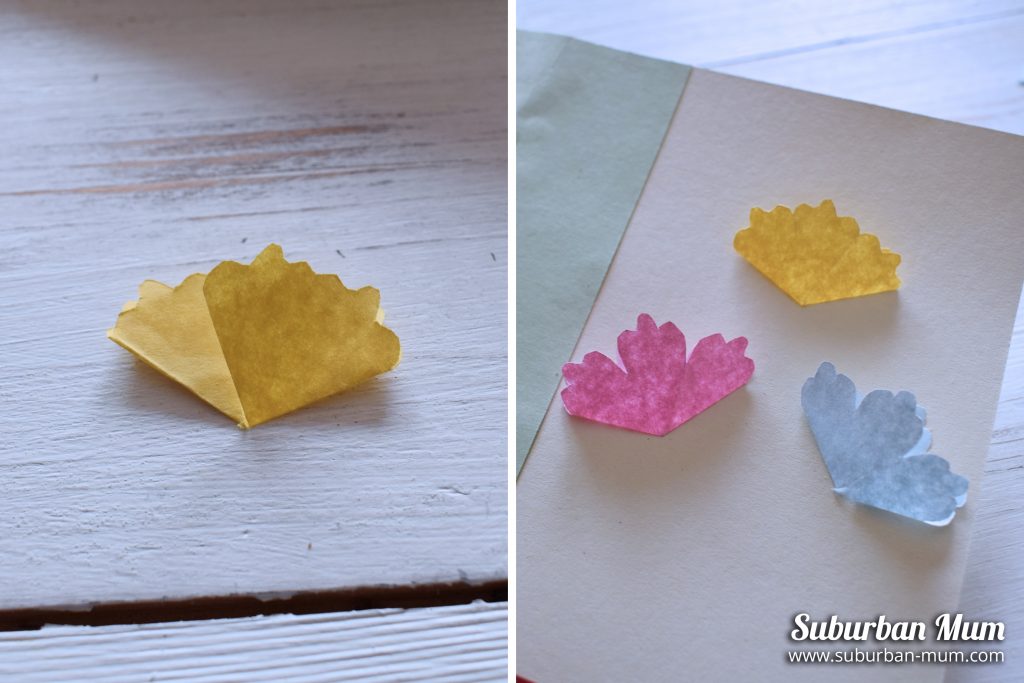
14. Finally, using a pen, draw in the flower stems. Your card is now finished!


*I’m a Bostik Craft Blogger and we were sent a box of crafts from Bostik in order to create these items.
Pin it for later:
![[AD] ✨ Festive magic for local families in the heart of Guildford ✨
We had the loveliest evening exploring the @guildfordilluminate light trail at Guildford Castle
The trail takes around 30–40 mins
with cosy stops for hot chocolate and toasting marshmallows, it’s a gorgeous Christmas activity for Surrey families.
It’s on until 4th January and makes the perfect festive plan:
🛍️ Christmas shopping in town
✨ The light trail
🍽️ Finish with dinner in Guildford
If you’re looking for a magical, stress-free festive outing with the kids — this is one to add to your Christmas list
📍 Guildford Castle, Castle St, Guildford GU1 3SX
#GuildfordWithKids #SurreyFamilies #ChristmasInSurrey](https://suburban-mum.com/wp-content/uploads/2018/09/589257185_18566118850016840_4432952740767953046_n-180x320.jpg)
![[AD] We went to the newly opened Cha Sha Kingston a couple of weeks ago, and wow — taste bud adventure unlocked! The boys devoured the masala fries and chicken tikka rolls, while we couldn’t get enough of that epic kebab butter curry 😍🍛.
It’s amazing value for food this tasty (and everyone left happy and VERY full!).
Delicious food, vibrant vibes and incredible value — the perfect combo for your next meal.
📍Cha Sha Kingston
43 Surbiton Road, KT1 2HG
🌐 chasha.co.uk
Other Cha Sha locations in Birmingham, Ilford, Southampton and Wembkey
#ChaSha #ChaShaKingston #KingstonEats #FoodieFinds #UKFoodie #FoodReview #KingstonUponThames #FamilyEats #FamilyDining #FoodieKids](https://suburban-mum.com/wp-content/uploads/2016/02/574770541_18560351146016840_6855048070839528040_n-180x320.jpg)

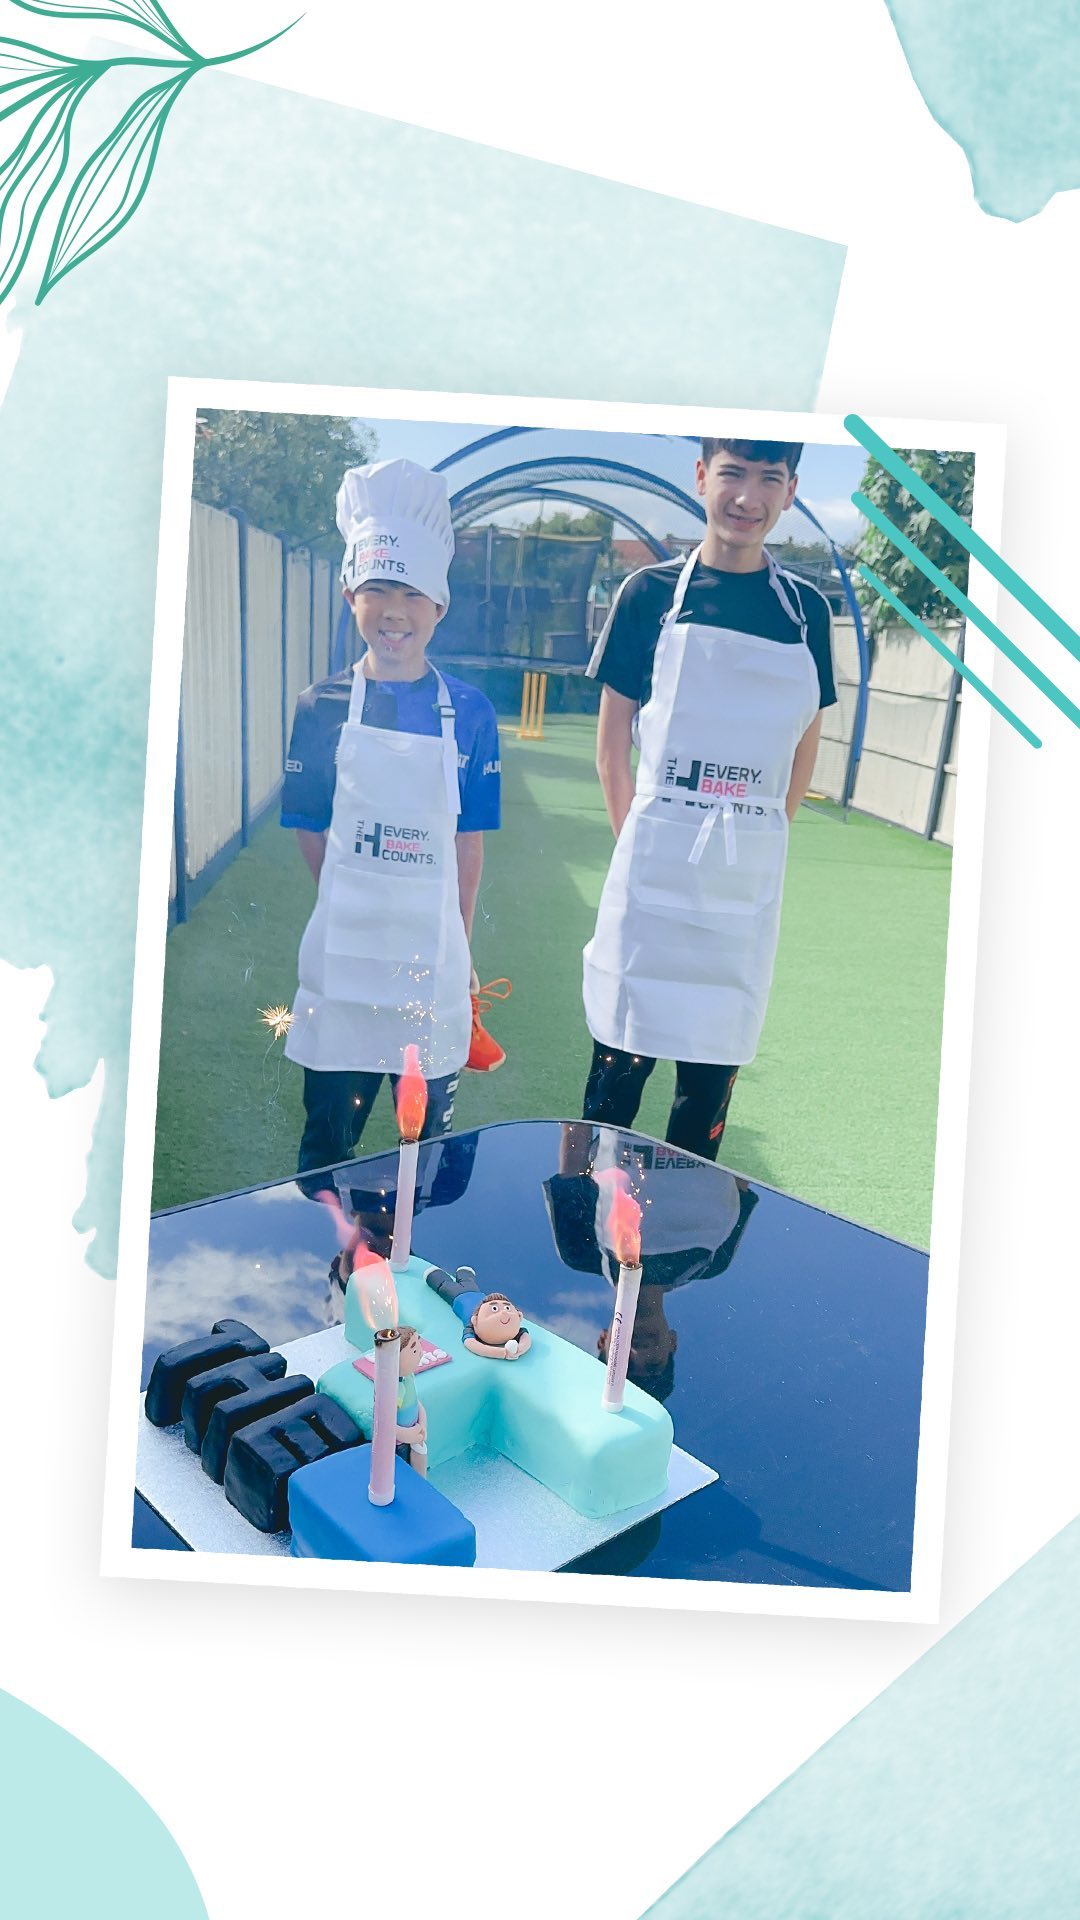
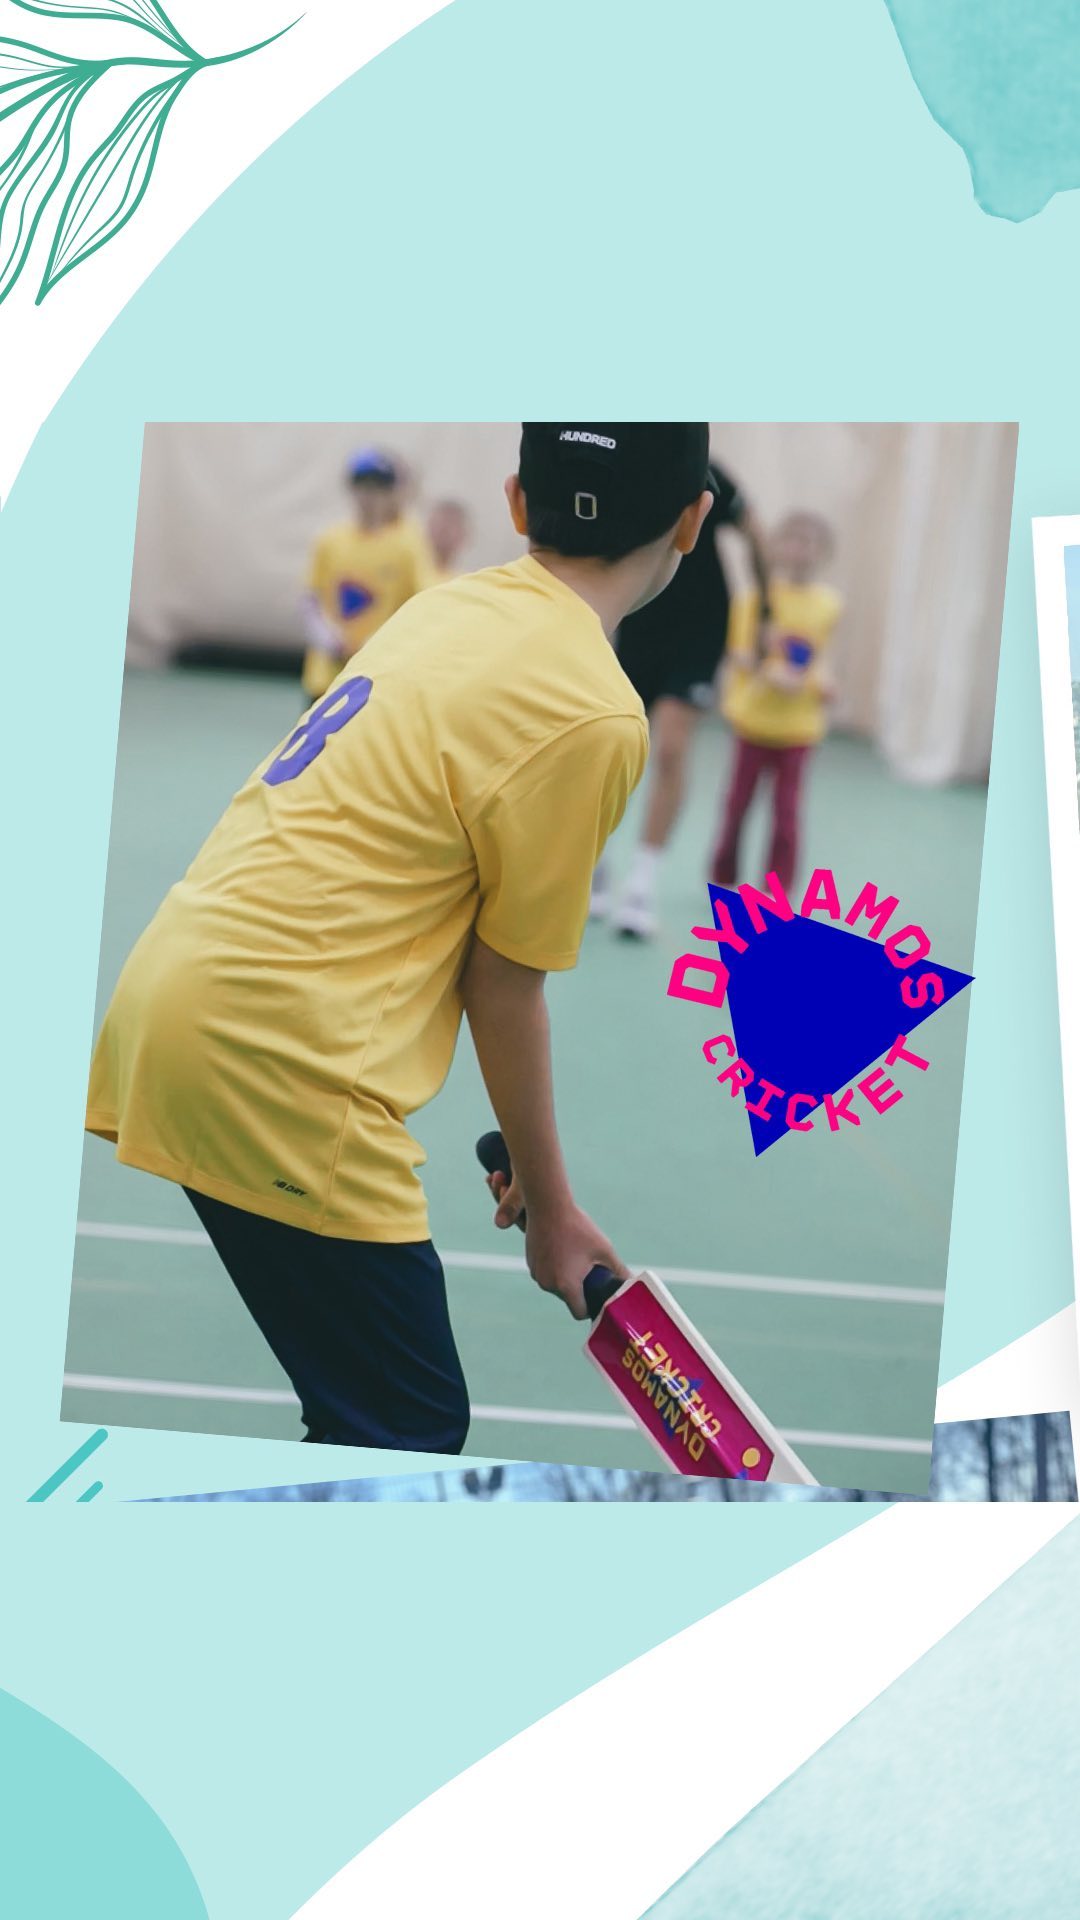
![[AD] We’re a cricket-mad family, so we’re buzzing that @thehundred is back this August! 🏏🔥
To get ready, M tried out the official FREE Activity Pack — and it’s brilliant! 🙌
Packed with fun games, creative challenges and sporty tasks, it’s perfect for getting kids hyped whether you’re at home or on the go.
👉Download yours now (link in bio)
@londonspirit @ovalinvincibles #EveryMomentCounts #TheHundred
#EnglandCricket #CricketFamily #TheHundredCricket #LondonBloggers #Cricket #CricketIsLife #kidsfun](https://suburban-mum.com/wp-content/uploads/2022/11/505472555_18531279601016840_7092520074819907569_n-180x320.jpg)

![[AD - Press visit]
We enjoyed the glorious sunshine this weekend with a trip to Brighton. We went on the @brightoni360official which is right by the sea front.
The i360 pod take a slow journey up, allowing you to take in views across Brighton and the South Downs 450ft above ground. There’s a bar inside with drinks and snacks available to purchase and the experience lasts 25 minutes.
Afterwards, we headed to the open air roller rink for a roller skating session!
The roller rink is:
⭐ Suitable for over 5s
⭐ £6.50 if you have your own skates or £9.50 if you need to hire them
⭐ 45 minutes per session
Full details to visit the i360 + skating
📍 Brighton i360, Lower Kings Road, Brighton BN1 2LN
🚗 Parking nearby (we parked in the Regency Square Car park)
🎟️ Prices start from £25.40 for an adult and £16.90 for a child
🕐 Opening hours are currently Sun-Fri 10.30am-18.30pm and until 19.30pm on Saturdays
☕️ Bar inside the i360, cafe and gift shop
Book tickets here:
https://tickets.brightoni360.co.uk/tickets/?_ga=2.195305772.1869001490.1689671753-1757164059.1689671753/#events?eventid=157](https://suburban-mum.com/wp-content/uploads/2015/04/417980235_313576471048632_3682382982231216432_n.jpg)

![[AD] ***Summer of fun at Barracudas Activity Camps!****
There is plenty for kids to do at @barracudas_activity_day_camps
From Tennis, Archery, Swimming, Motor Sports and more you can be sure that there will be something for kids aged 4.5-14. ⚽🏈🥅🎾🏓🏎️🏹🏊♂️🏉
You can book on a day by day basis - so it can fit in with any other days out/activities you have planned and there are early drop off and late pickup options available. Barracudas are also Ofsted registered so you can use your Childcare Vouchers too.
⭐⭐⭐Get £20 off a week or £4 off a day using my discount code: MARIA20⭐⭐⭐
#BarracudasActivityDayCamp #BarracudasActivityCamp #BarracudaAmbassadors #SummerHolidays #SchoolHolidays #Summer2023 #SummerCamp #DayCare #Camp #KidsCamp #surreymummy #surreymums #SummerOfFun #ActivityCamps #HolidayCamps #Childcare #SchoolHolidays #schoolholidaycamps](https://suburban-mum.com/wp-content/uploads/2024/07/353583570_625625966167953_545896259645102575_n.jpg)
![[AD] We have some super exciting news...we have been chosen to be Laser Quest Ambassadors, and the boys are over the moon!
We are really lucky that our local Laser Quest (@laserquestkingston) is just around the corner from us. It means we can pop in of a weekend or anytime during the school holidays, and with summer just around the corner, I know Laser Quest will be one of our go-to places for some family fun.
As well as games of Laser Quest, there are also VR experiences and arcade amusements too. To find out a bit more about how Laser Quest works, you can read my blog post: https://www.suburban-mum.com/laser-quest-kingston/ (clickable link in bio)
Don't forget to keep an eye out for our Laser Quest posts - I'm going to be giving away two family passes to use at Laserquest Kingston!
If you can't wait and want to head down to Laser Quest to try it out, use the code SUMMER30 for 30% off your booking. The code is valid from now until the end of August 2023 and can be used on Laser Quest games and birthday party bookings.
#LaserquestAmbassador #Laserquest #LaserquestKingston #ActivitiesForKids #FamilyFun #DaysOutWithKids #Lasertag #LaserquestVR #Kingston #ThingsToDoInKingston #SurreyFamilyDaysOut #ThingsToDoWithKids #RainyDayFun #SurreyMummy #SurreyLife #LifeWithKids #LifeWithBoys #familyfunday](https://suburban-mum.com/wp-content/uploads/2015/04/353230107_797358078406942_2405522556733455165_n.jpg)
![[AD] The sun has finally made an appearance and the boys have been making the most of it by spending it
in the garden.
They’re go-to is always football and they’ve been trying to improve their aim and accuracy with the new Messi Foldable Footlball goal from the #MessiTrainingSystem range.
I love the fact the goal is foldable, making it easy to store away when not in use. It is also lightweight so you can effortlessly pack it up and take it to the park or to a friend’s house.
The Messi Foldable Football Goal retails at £36 and can be purchased from @argos
You can read my full review here: https://www.suburban-mum.com/messi-foldable-football-goal/
#TrainLikeMessi #FoldableFootballGoal #FootballSkills #OutdoorFun #LionelMessi #LeoMessi #FootballAtHome #OutdoorKids #JustGetOutside #OutdoorsAndFree #ScreenFreeKids #WhateverTheWeatherKids @flair_gp](https://suburban-mum.com/wp-content/uploads/2015/04/341194882_615024710178056_41977149395989448_n.jpg)

![[AD] We are absolutely thrilled to announce that we are Barracuda Ambassadors again this year.
With Easter just around the corner, the boys were sent the @barracudas_activity_day_camps new camp kit in preparation for the school holidays.
There’s a wide range of activities for kids aged 4.5 - 14 including Tennis, Archery, Basketball, Arts & Crafts and more.
If you like the sound of Barracudas, find out more over on their website. You can also save £20 a week or £4 a day, using my discount code: MARIA20](https://suburban-mum.com/wp-content/uploads/2024/07/336812306_765234558514317_685553691647241974_n.jpg)




2 thoughts on “Craft Corner: How to make a Thank You card for Teachers”
Pingback: Five Fun Summer PVA Craft Projects from Bostik | Tots 100
Such a cute idea for students. Cute blog ever….