Creating an Advent Train with Hobbycraft
I don’t know about you but I am so excited about Christmas! I love the build-up to it to the big day. Buying and decorating the Christmas tree truly marks the start of the festive period for me.
As you can imagine, my boys are just as excited about Christmas – they’ve already written their letters to Santa and can’t wait to start the Christmas countdown. Which brings me nicely onto advent calendars.
I normally pick up character themed calendars from the supermarket for the boys but have bought LEGO ones for them this year.
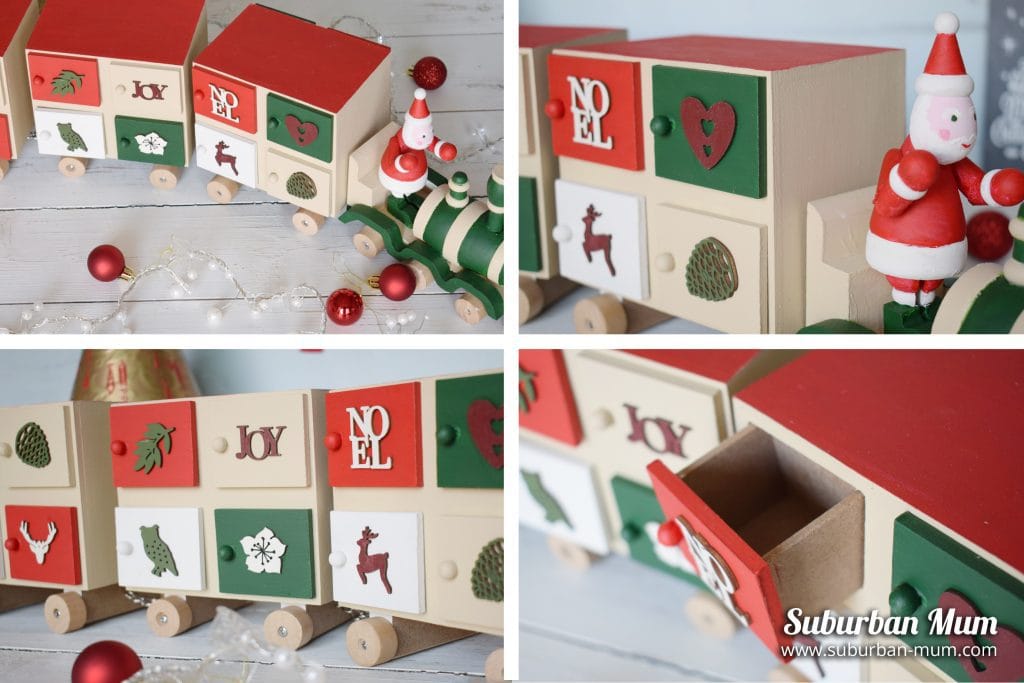
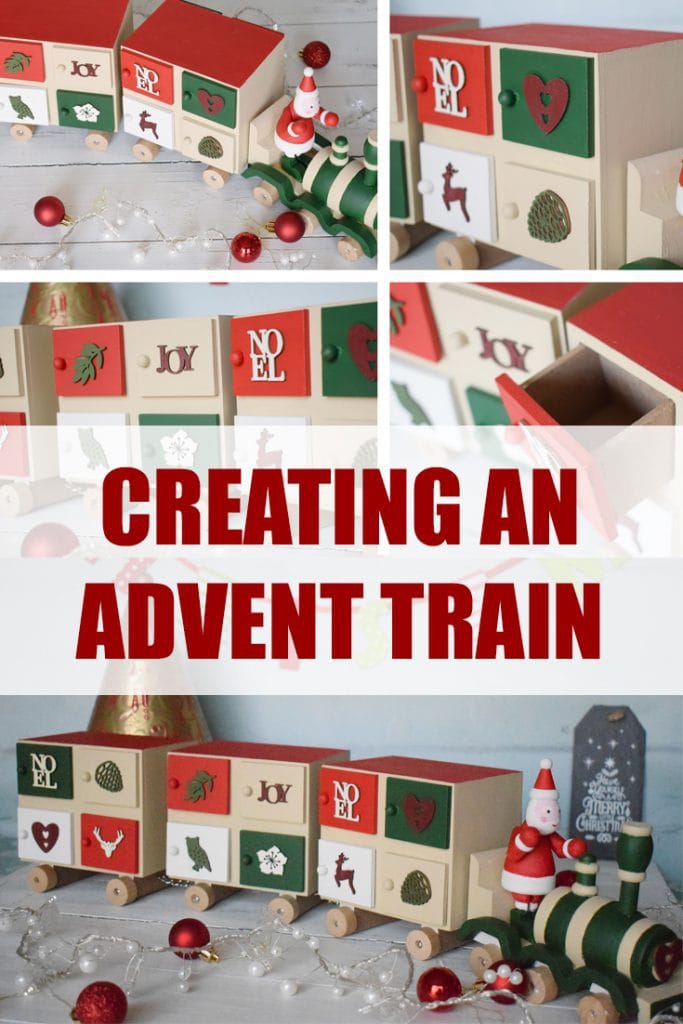
When Hobbycraft got in touch and asked us to create a Christmas Craft and given how much my boys love trains, I thought that an advent train would be absolutely perfect and would be something to surprise them with on the 1st December.
Make your own advent train
We were sent the following items from Hobbycraft to create the train:
- Advent Train
- Acrylic paint – white
- Acrylic paint – Red
- Acrylic paint – Green
- Acrylic paint – Buff
- Wooden Christmas Toppers
- Gold Pen
You’ll also need the following items:
- Paint brushes in various sizes
- PVA Glue
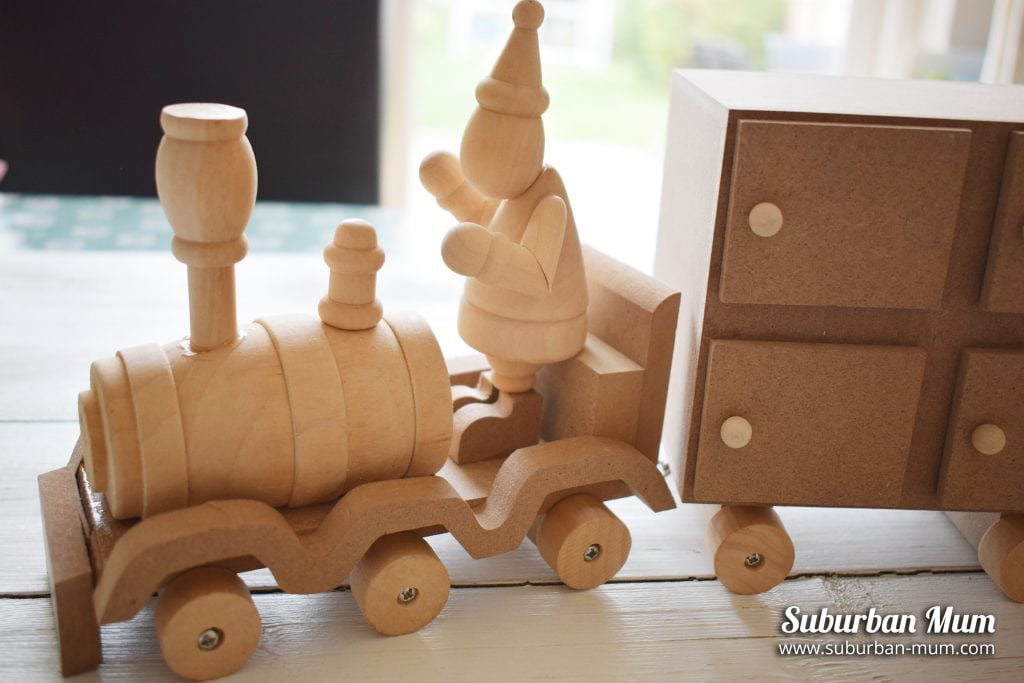
1. I started off by taking the wheels off each train carriage, I also unscrewed the chains between each carriage to separate them out ready for painting.
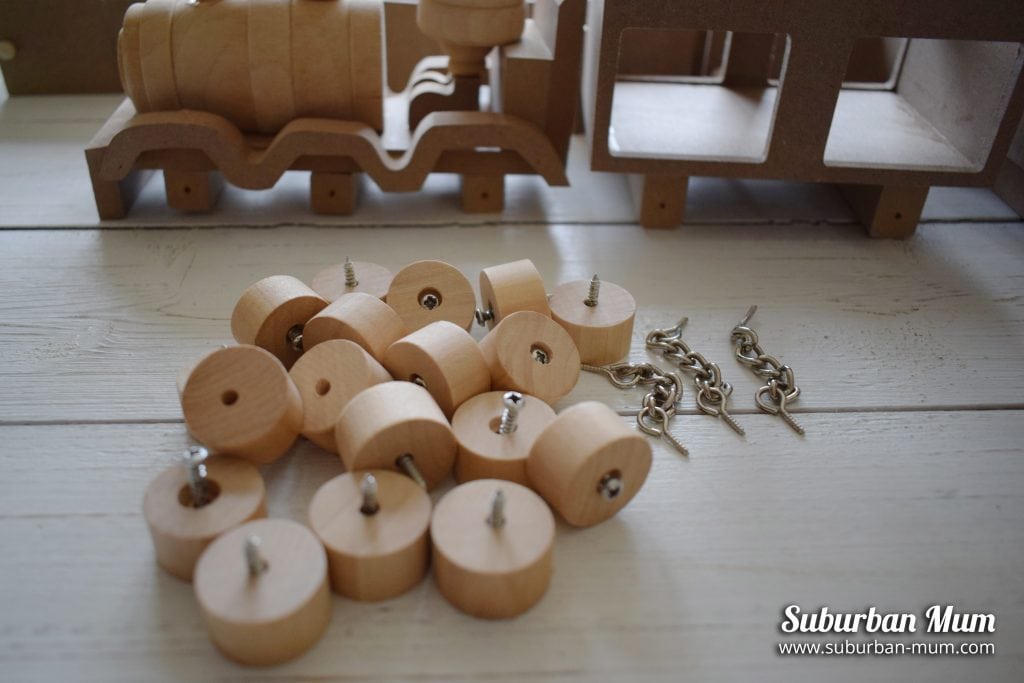
2. Paint the train using the white acrylic paint. This gives it a base for your other colours later.
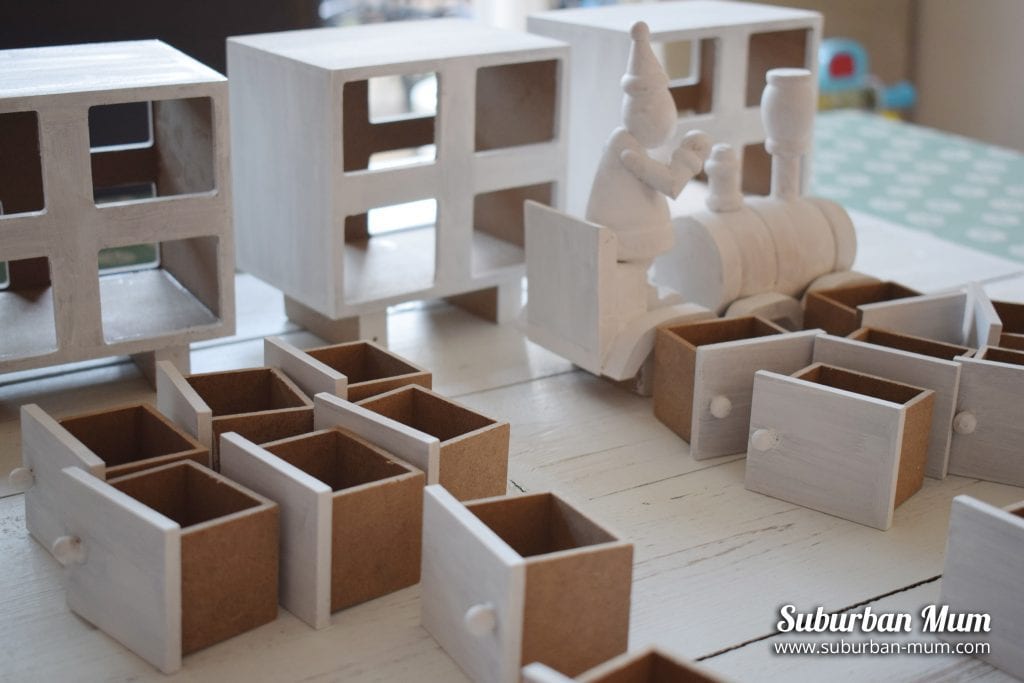
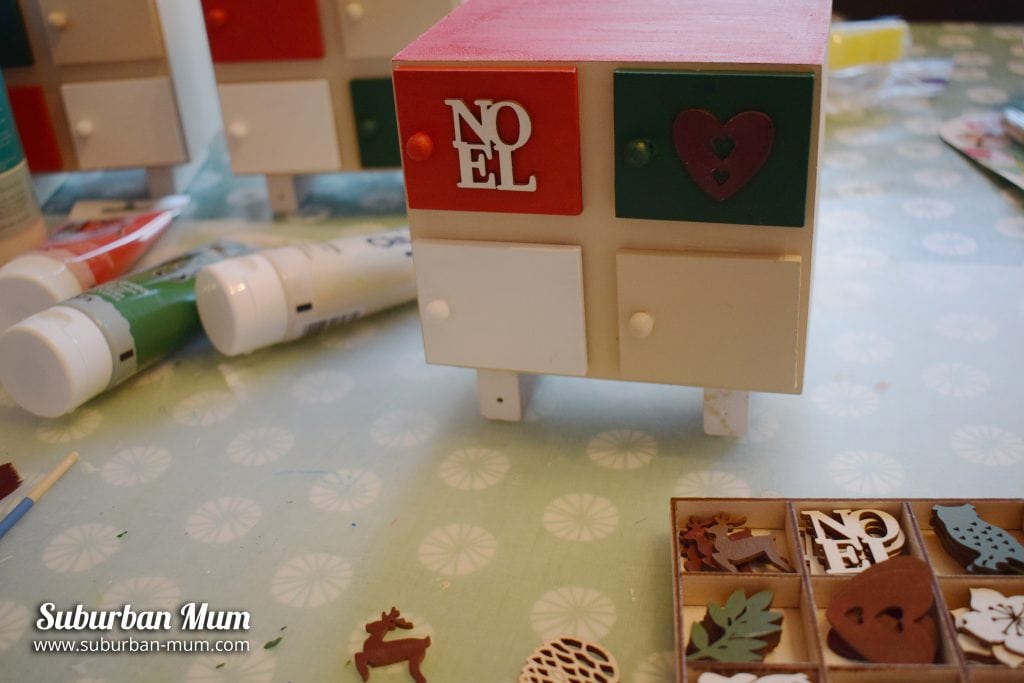
3. Now its time paint the drawers. You need to group them into 4 groups of 6 and paint each group in red, green, buff and white. You’ll need to paint a good few coats on to get an even colour.
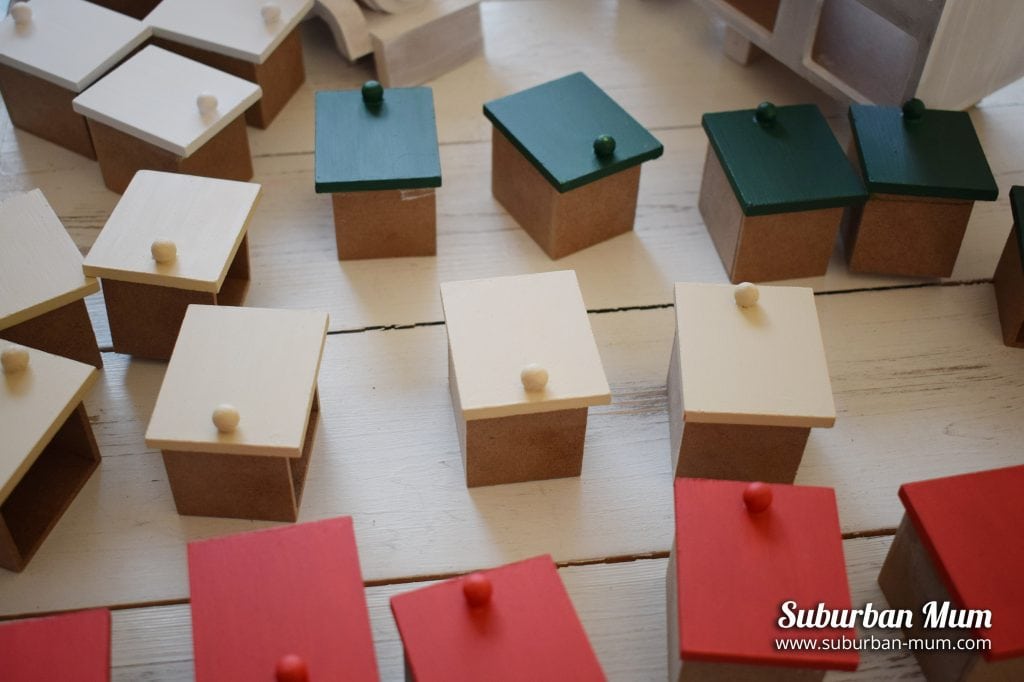
4. Next, it’s time to paint the carriage bodies in buff, leave the top and paint this in red. Again, this will need a good few coats to get an even colour.
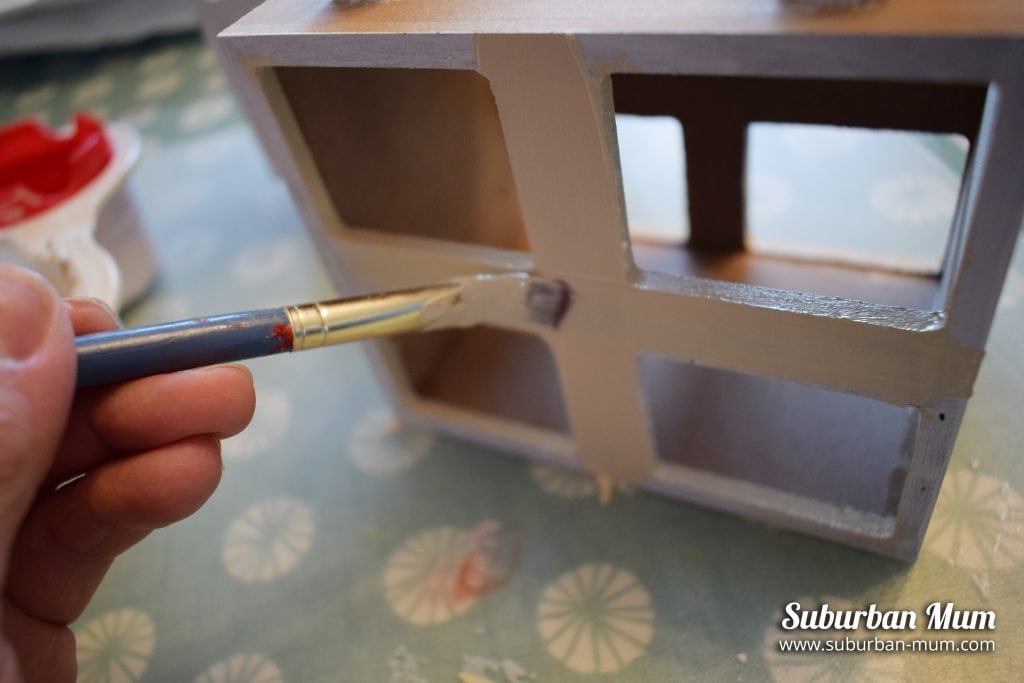
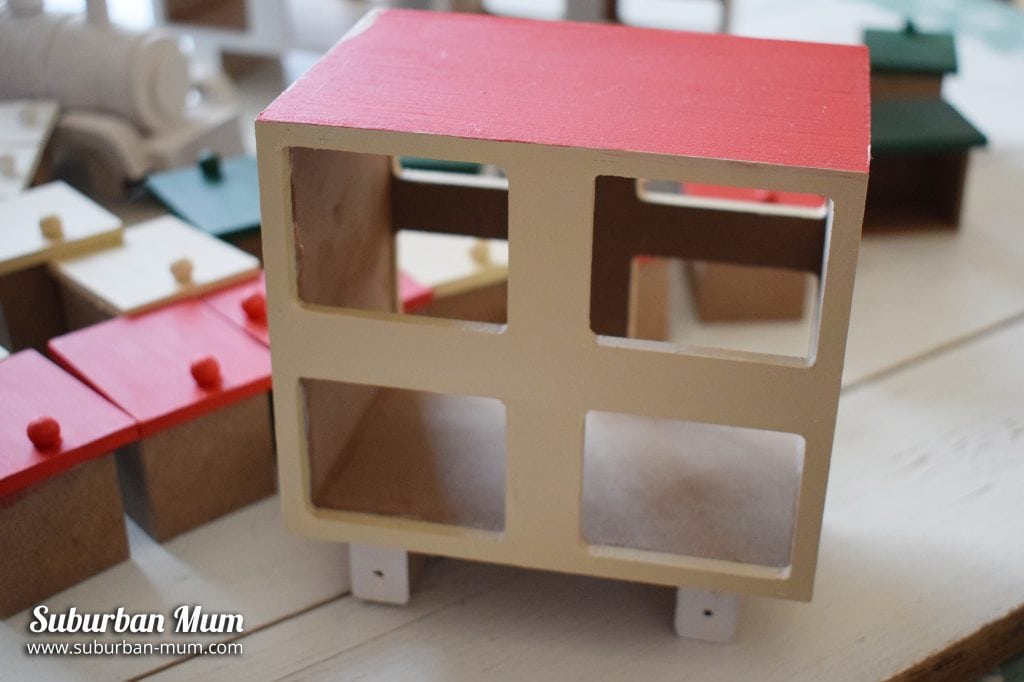
5. Next, start painting Santa using white and red.
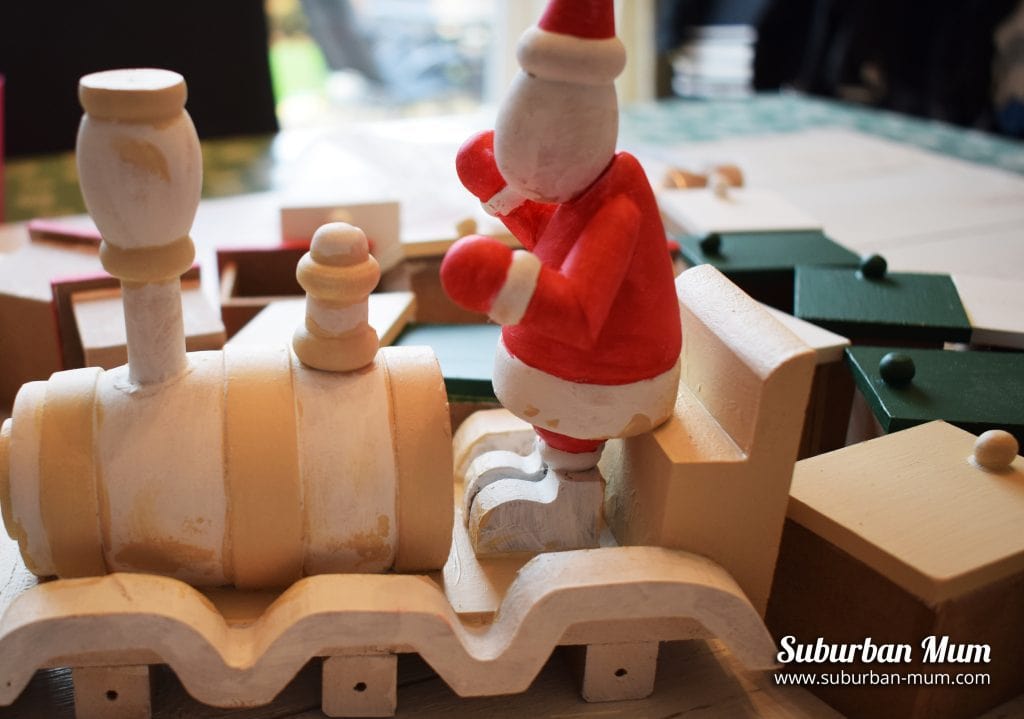
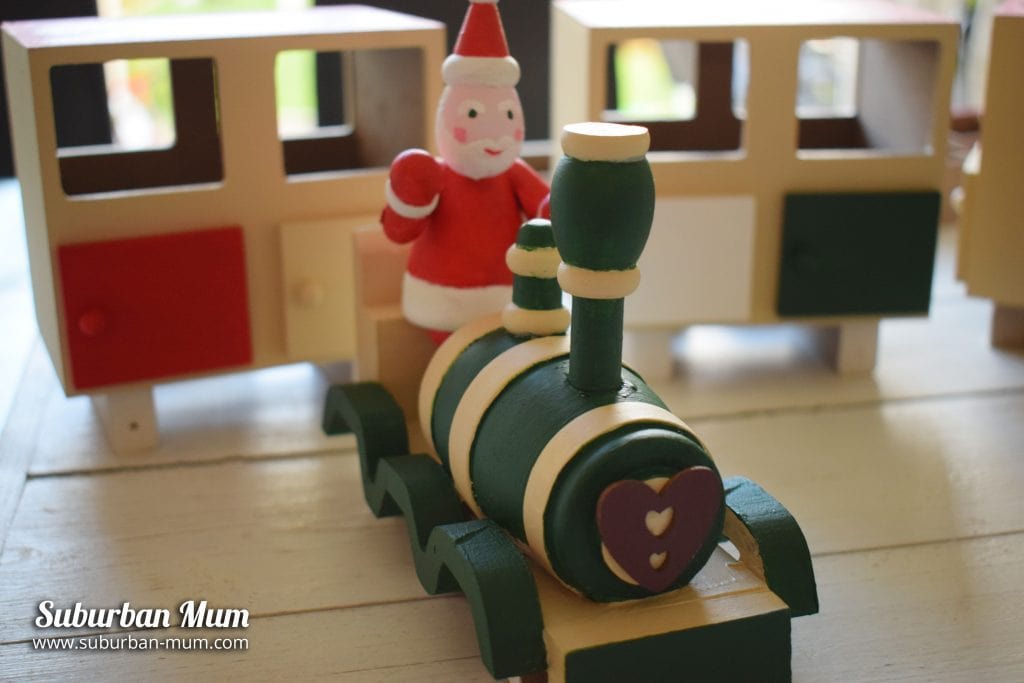
6. Then paint the engine in buff and green – as shown below. A small brush will be needed to get into the nooks and crannies.
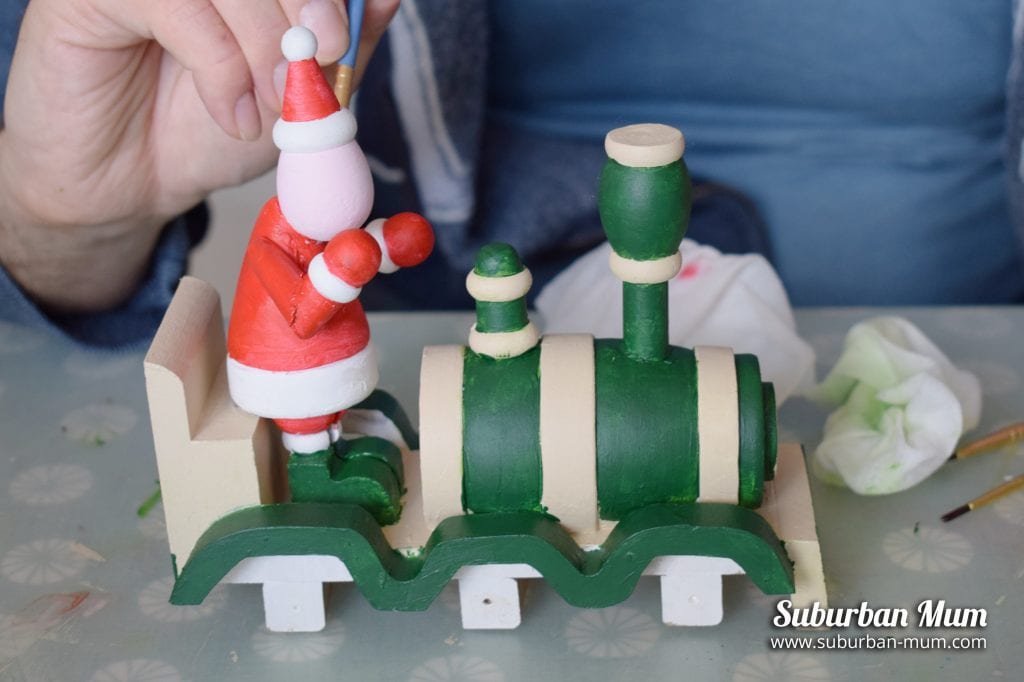
7. For Santa’s face mix a little red paint with white to make pink to paint his head. Then paint his face like below.

8. Pop the drawers back into the carriages. You can now decorate each drawer with the wooden Christmas toppers, making sure to distribute them evenly. Then stick them on with PVA glue.
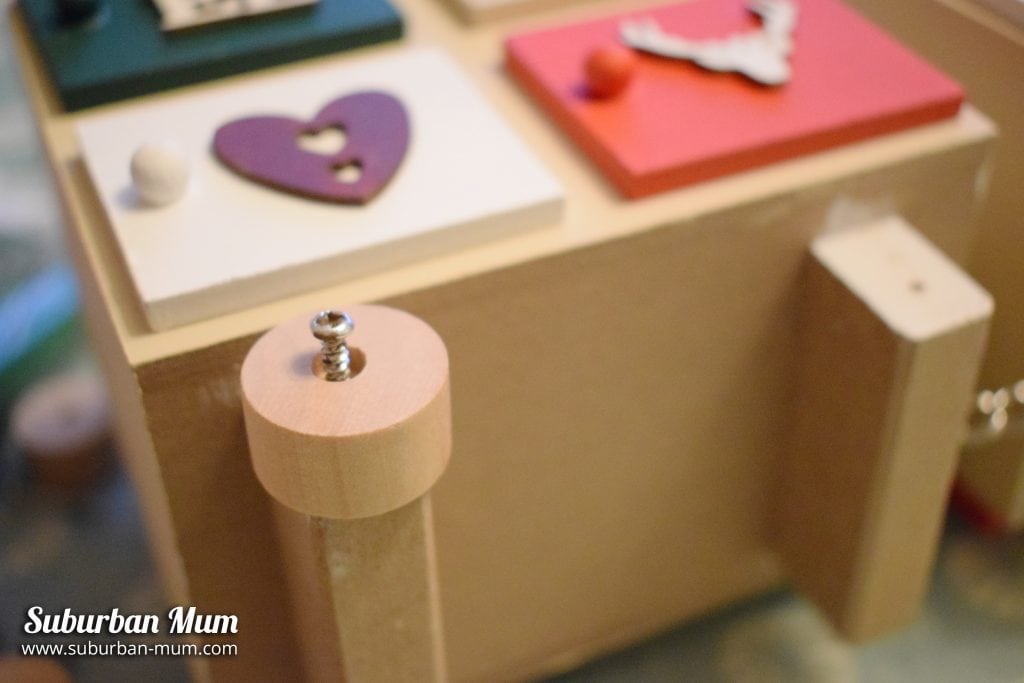
9. Once everything has dried, screw the wheels back on and connect the carriages back together.
10. Using the gold pen, you can number each of the drawers and write a message on top of the carriages should you wish you do so.
Your train is now finished!
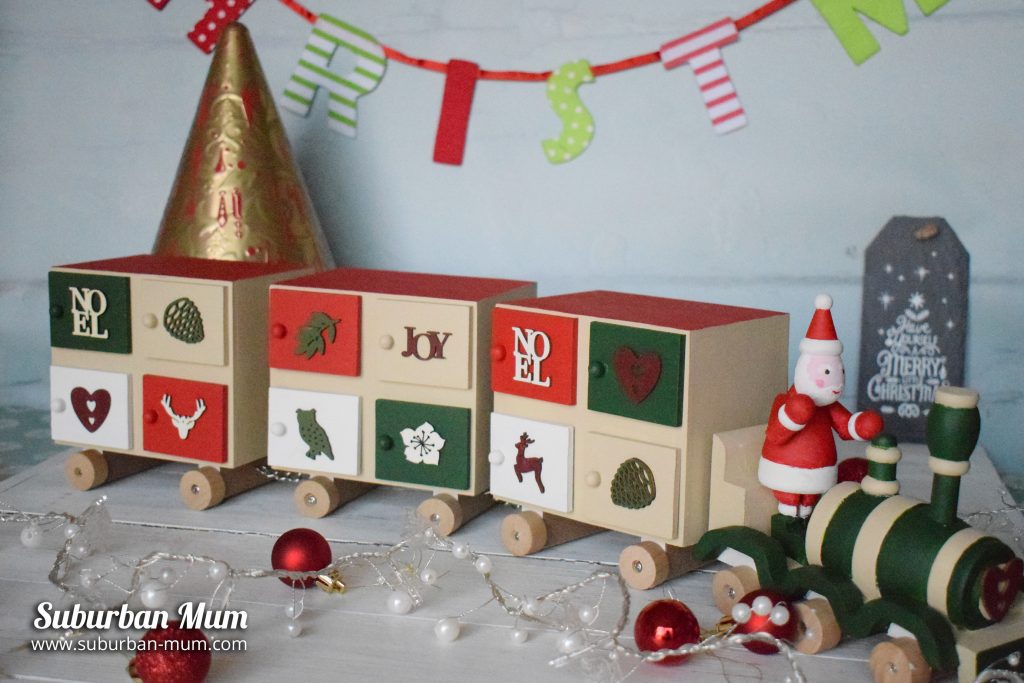
I absolutely LOVE the advent train and cannot wait to show this to the boys. I think it’s going to be a key centrepiece that will be used year after year.

Get creative with Hobbycraft!
Hobbycraft has opened its new store in Farnborough located at Horizon Retail Park. It’s packed with crafting materials to suit all ages and abilities. Crafters of all levels are all welcome to pop in and chat to one of the colleagues, who are all passionate about arts and crafts.
They also have a fantastic craft blog that is packed full of ideas to inspire to you make your own handmade items. Head over there to check out some great ideas for Christmas makes. You can buy what you need direct from the Hobbycraft website and you get free delivery with orders over £20.
*This post has been created in collaboration with Hobbycraft
Pin it for later:
![[AD] ✨ Festive magic for local families in the heart of Guildford ✨
We had the loveliest evening exploring the @guildfordilluminate light trail at Guildford Castle
The trail takes around 30–40 mins
with cosy stops for hot chocolate and toasting marshmallows, it’s a gorgeous Christmas activity for Surrey families.
It’s on until 4th January and makes the perfect festive plan:
🛍️ Christmas shopping in town
✨ The light trail
🍽️ Finish with dinner in Guildford
If you’re looking for a magical, stress-free festive outing with the kids — this is one to add to your Christmas list
📍 Guildford Castle, Castle St, Guildford GU1 3SX
#GuildfordWithKids #SurreyFamilies #ChristmasInSurrey](https://suburban-mum.com/wp-content/uploads/2018/09/589257185_18566118850016840_4432952740767953046_n-180x320.jpg)
![[AD] We went to the newly opened Cha Sha Kingston a couple of weeks ago, and wow — taste bud adventure unlocked! The boys devoured the masala fries and chicken tikka rolls, while we couldn’t get enough of that epic kebab butter curry 😍🍛.
It’s amazing value for food this tasty (and everyone left happy and VERY full!).
Delicious food, vibrant vibes and incredible value — the perfect combo for your next meal.
📍Cha Sha Kingston
43 Surbiton Road, KT1 2HG
🌐 chasha.co.uk
Other Cha Sha locations in Birmingham, Ilford, Southampton and Wembkey
#ChaSha #ChaShaKingston #KingstonEats #FoodieFinds #UKFoodie #FoodReview #KingstonUponThames #FamilyEats #FamilyDining #FoodieKids](https://suburban-mum.com/wp-content/uploads/2016/02/574770541_18560351146016840_6855048070839528040_n-180x320.jpg)

![[AD] We’re a cricket-mad family, so we’re buzzing that @thehundred is back this August! 🏏🔥
To get ready, M tried out the official FREE Activity Pack — and it’s brilliant! 🙌
Packed with fun games, creative challenges and sporty tasks, it’s perfect for getting kids hyped whether you’re at home or on the go.
👉Download yours now (link in bio)
@londonspirit @ovalinvincibles #EveryMomentCounts #TheHundred
#EnglandCricket #CricketFamily #TheHundredCricket #LondonBloggers #Cricket #CricketIsLife #kidsfun](https://suburban-mum.com/wp-content/uploads/2022/11/505472555_18531279601016840_7092520074819907569_n-180x320.jpg)


![[AD - Press visit]
We enjoyed the glorious sunshine this weekend with a trip to Brighton. We went on the @brightoni360official which is right by the sea front.
The i360 pod take a slow journey up, allowing you to take in views across Brighton and the South Downs 450ft above ground. There’s a bar inside with drinks and snacks available to purchase and the experience lasts 25 minutes.
Afterwards, we headed to the open air roller rink for a roller skating session!
The roller rink is:
⭐ Suitable for over 5s
⭐ £6.50 if you have your own skates or £9.50 if you need to hire them
⭐ 45 minutes per session
Full details to visit the i360 + skating
📍 Brighton i360, Lower Kings Road, Brighton BN1 2LN
🚗 Parking nearby (we parked in the Regency Square Car park)
🎟️ Prices start from £25.40 for an adult and £16.90 for a child
🕐 Opening hours are currently Sun-Fri 10.30am-18.30pm and until 19.30pm on Saturdays
☕️ Bar inside the i360, cafe and gift shop
Book tickets here:
https://tickets.brightoni360.co.uk/tickets/?_ga=2.195305772.1869001490.1689671753-1757164059.1689671753/#events?eventid=157](https://suburban-mum.com/wp-content/uploads/2015/04/417980235_313576471048632_3682382982231216432_n.jpg)

![[AD] ***Summer of fun at Barracudas Activity Camps!****
There is plenty for kids to do at @barracudas_activity_day_camps
From Tennis, Archery, Swimming, Motor Sports and more you can be sure that there will be something for kids aged 4.5-14. ⚽🏈🥅🎾🏓🏎️🏹🏊♂️🏉
You can book on a day by day basis - so it can fit in with any other days out/activities you have planned and there are early drop off and late pickup options available. Barracudas are also Ofsted registered so you can use your Childcare Vouchers too.
⭐⭐⭐Get £20 off a week or £4 off a day using my discount code: MARIA20⭐⭐⭐
#BarracudasActivityDayCamp #BarracudasActivityCamp #BarracudaAmbassadors #SummerHolidays #SchoolHolidays #Summer2023 #SummerCamp #DayCare #Camp #KidsCamp #surreymummy #surreymums #SummerOfFun #ActivityCamps #HolidayCamps #Childcare #SchoolHolidays #schoolholidaycamps](https://suburban-mum.com/wp-content/uploads/2024/07/353583570_625625966167953_545896259645102575_n.jpg)


![[AD] We have some super exciting news...we have been chosen to be Laser Quest Ambassadors, and the boys are over the moon!
We are really lucky that our local Laser Quest (@laserquestkingston) is just around the corner from us. It means we can pop in of a weekend or anytime during the school holidays, and with summer just around the corner, I know Laser Quest will be one of our go-to places for some family fun.
As well as games of Laser Quest, there are also VR experiences and arcade amusements too. To find out a bit more about how Laser Quest works, you can read my blog post: https://www.suburban-mum.com/laser-quest-kingston/ (clickable link in bio)
Don't forget to keep an eye out for our Laser Quest posts - I'm going to be giving away two family passes to use at Laserquest Kingston!
If you can't wait and want to head down to Laser Quest to try it out, use the code SUMMER30 for 30% off your booking. The code is valid from now until the end of August 2023 and can be used on Laser Quest games and birthday party bookings.
#LaserquestAmbassador #Laserquest #LaserquestKingston #ActivitiesForKids #FamilyFun #DaysOutWithKids #Lasertag #LaserquestVR #Kingston #ThingsToDoInKingston #SurreyFamilyDaysOut #ThingsToDoWithKids #RainyDayFun #SurreyMummy #SurreyLife #LifeWithKids #LifeWithBoys #familyfunday](https://suburban-mum.com/wp-content/uploads/2015/04/353230107_797358078406942_2405522556733455165_n.jpg)

![[AD] The sun has finally made an appearance and the boys have been making the most of it by spending it
in the garden.
They’re go-to is always football and they’ve been trying to improve their aim and accuracy with the new Messi Foldable Footlball goal from the #MessiTrainingSystem range.
I love the fact the goal is foldable, making it easy to store away when not in use. It is also lightweight so you can effortlessly pack it up and take it to the park or to a friend’s house.
The Messi Foldable Football Goal retails at £36 and can be purchased from @argos
You can read my full review here: https://www.suburban-mum.com/messi-foldable-football-goal/
#TrainLikeMessi #FoldableFootballGoal #FootballSkills #OutdoorFun #LionelMessi #LeoMessi #FootballAtHome #OutdoorKids #JustGetOutside #OutdoorsAndFree #ScreenFreeKids #WhateverTheWeatherKids @flair_gp](https://suburban-mum.com/wp-content/uploads/2015/04/341194882_615024710178056_41977149395989448_n.jpg)

![[AD] We are absolutely thrilled to announce that we are Barracuda Ambassadors again this year.
With Easter just around the corner, the boys were sent the @barracudas_activity_day_camps new camp kit in preparation for the school holidays.
There’s a wide range of activities for kids aged 4.5 - 14 including Tennis, Archery, Basketball, Arts & Crafts and more.
If you like the sound of Barracudas, find out more over on their website. You can also save £20 a week or £4 a day, using my discount code: MARIA20](https://suburban-mum.com/wp-content/uploads/2024/07/336812306_765234558514317_685553691647241974_n.jpg)






6 thoughts on “Creating an Advent Train with Hobbycraft”
I love the finished train. The difference between how it arrived and what you ended up with is absolutely brilliant. So talented Maria x
Oh my goodness lovely, your advent train is so so cute! I love it, and the work you’ve put into it will certainly pay off with a little train to treasure and use for years to come. x
That is ridiculously gorgeous!!! I’ve been looking for a wooden advent calendar but I hadn’t thought there were kits!
Wow, this is amazing and will become a family heirloom. I have pinned it.
This is such a lovely idea and it looks absolutely beautiful! Great job lovely x
This looks ace – and such a lovely thing to keep and use every year 🙂